Creating your own website is not something reserved for programmers and web designers.
If you have some nice ideas that you would like to put online in the vast world of the internet, below I will list the various steps to do so, from registering a domain to finding a hosting service and installing and using wordpress for physically create your site.
If you have a clear idea of what you want to publish the steps are the followings:
- Register a domain
- Web hosting
- The choice of wordpress.org
- Installing wordpress.org in your hosting service
- Set DNS servers
- SSL
- WordPress guide (basic)
- Indexing your site
- Conclusions
Register a domain
The first step is to find a domain name that can represent the content of your site.
Once you have chosen the name you have to see if this domain is free or if it is already registered by others. To do this, you can check directly on the sites where you can register domains. I will mention a few:
Each of these sites allows you to enter the name of the domain you want to register. Once entered and after clicking on search the site, check if the chosen domain name is free or already registered by others.
If it is free, you are offered to register it at a price that may vary from site to site. Just select it and continue with the purchase to be able to start using your domain. The registration fee is not one-off but must generally be renewed every 1 or 2 years, depending on the contract.
If, on the other hand, the domain is not free but has already been registered by others, the site still offers alternatives very similar to the name chosen by you. For example, if the domain name chosen is site.com and this has already been registered, the same domain names but with different top level domains will certainly be proposed, such as site.net, site.it, site.live, site.info, site.org, etc. Also .com with a similar but different domain: mysite.com, si7e.com, wwwsite.com, website.com, etc.
If the domain is not free you can also contact the owner to make him an offer to buy that domain.
Web hosting
Once you have registered your domain, next step is to find a web hosting service. Web hosting is a network service that allows you to host your website.
Basically it is the physical server that will host your site. You can always skip this step if you can use your own server with a static IP address, an installed web-server (like “apache”, “tomcat”, “nginx” or “Microsoft IIS”) and a stable and ultra-fast internet connection :-)))
Some of the best known hosting services are the following:
It must be said that some hosting services (almost all) also allow you to register your domain (skipping the previous point).
Web hosting services can be free or paid. The main difference is that the free ones are limited both on the disk space offered for the files of your site and in terms of bandwidth. This may be fine for a provisional site or one with no high expectations. The paid ones, instead, offer a higher level of service and security. They generally have multiple pricing plans and you have to choose the one that suits you best.
The higher the price, the higher the services offered, such as disk space, bandwidth, SSL certificates, SSH access, free email accounts using the same domain chosen by you, periodic backups and so on.
Almost all hosting services allow you to install inside them the useful software to physically create your website. In this post I’ll cover wordpress.org, the open source software you can use to create a website or a blog.
But first I have to say why wordpress.org and not wordpress.com.
Differences between wordpress.org and wordpress.com

WordPress is one of the main site building software.
In wordpress.org site you can download the core wordpress package or, as seen above, almost all hosting services allow you to install inside them site building software (including wordpress.org). It is an open source project that allow you to customize everything you want, install plugins and modify the source code of the site.
WordPress.com is a commercial company which allows you to make your own blog for free but it is much more limited than wordpress.org. Just to say a little, you can’t upload all plugins and you can’t access the source code of your pages. Furthermore your site must be under a subdomain and your reserved disk space is limited. You can only buy extra services.
So you can’t customize the site as you want and the site is not your total property because it is wordpress.com that hosts it for free.
In conclusion if you want to create a serious and monetizable site the best option is wordpress.org while if you want a simple little blog wordpress.com may be enough for you.
Installing wordpress.org in your hosting service
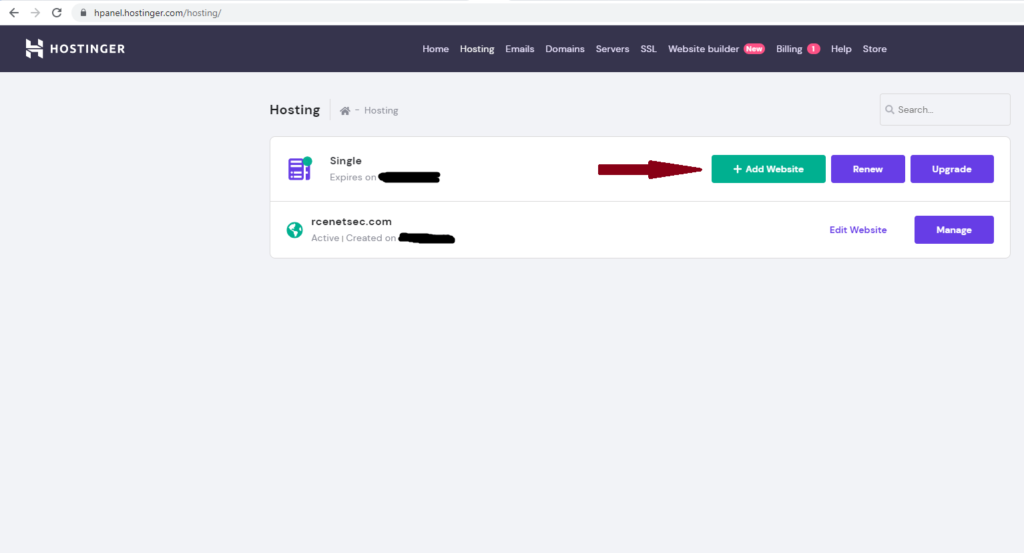
Once you have purchased your own space on a web hosting service, now you can setup wordpress.org installation. It is very easy to do. Here I’ll explain about hostinger.
Just access with your credentials into hostinger website at “Hosting” page and select “Add website”:
Then you have to put the name of your domain previously purchased:
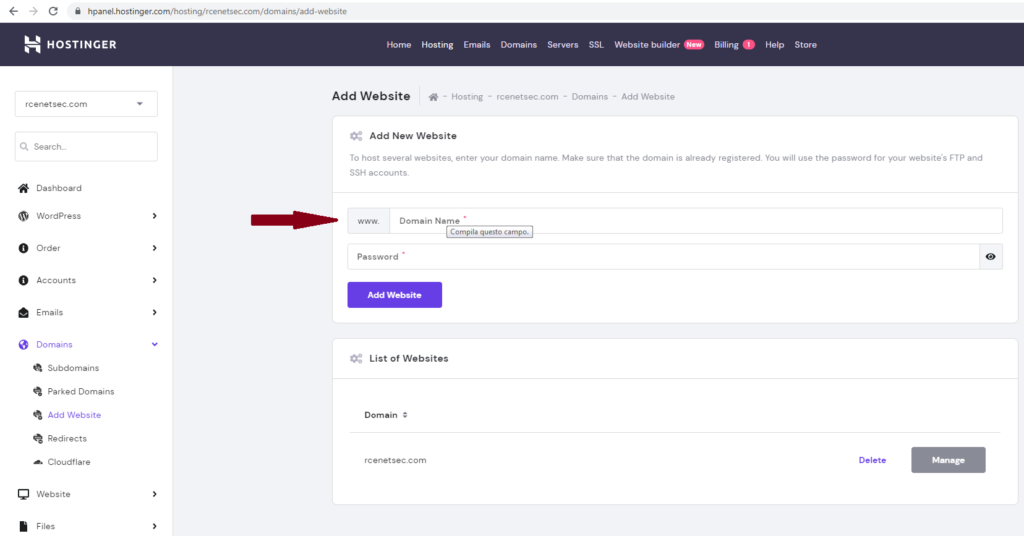
and click “Add Website”.
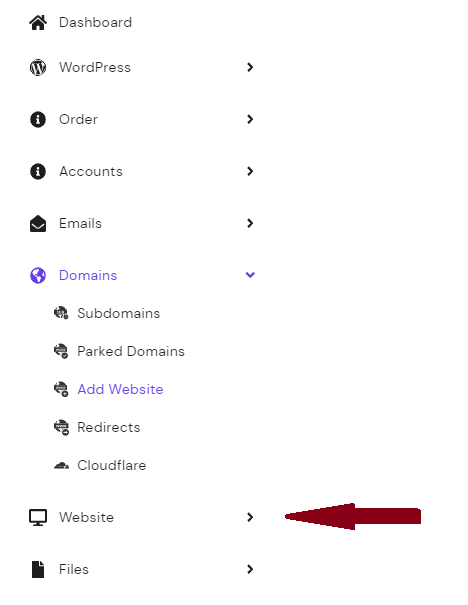
So in “Website” menu you can install wordpress.org selecting “Auto Installer” submenu:
and:
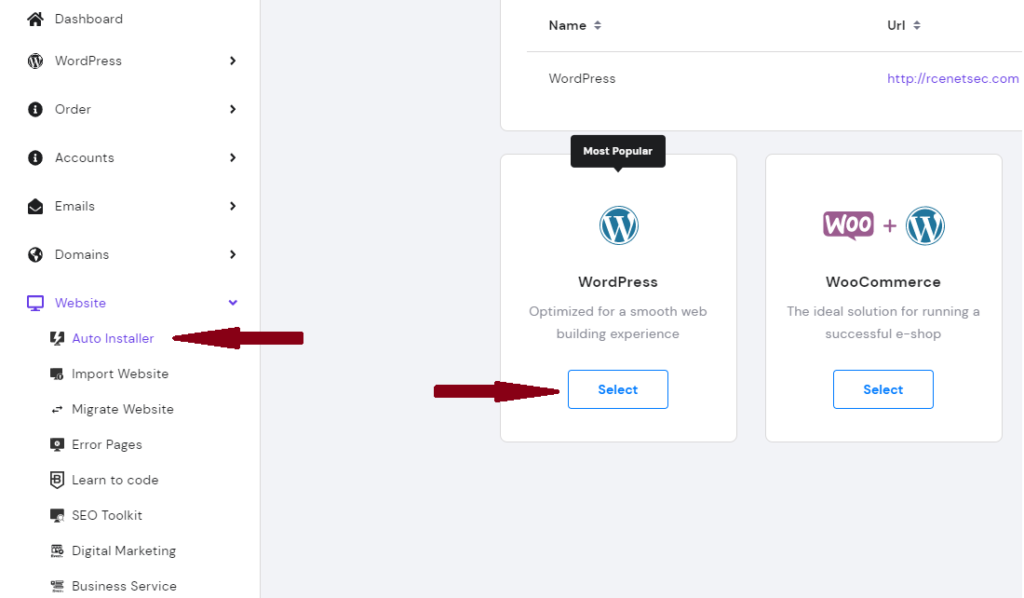
As you can see just click on “Select” under WordPress.
During installation phase it asks to set credentials to connect to database. I recommend choosing a very strong password to prevent someone from being able to log in and do what he wants with our site.
Set DNS servers
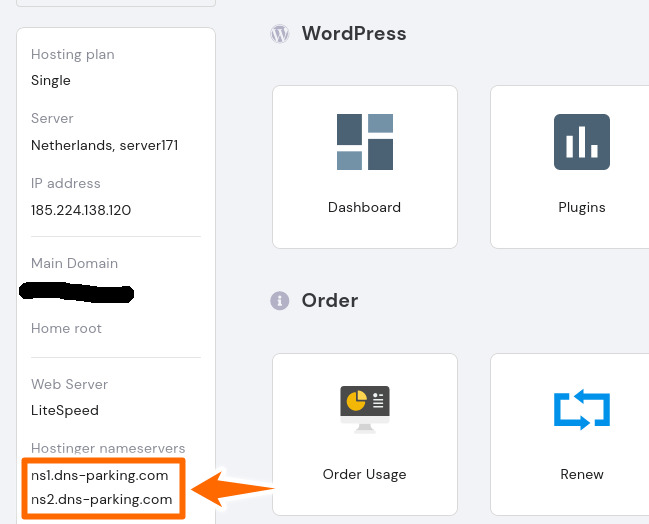
Once WordPress is installed you have to set DNS servers on your domain register (the service we have chosen to register our domain in the first step). To do so you have to find the Hostinger nameservers to be set later to your domain register service. After doing all the previous steps regarding hostinger you can find its nameservers in the main menu. Just login and click “Manage” next to your domain name. You’ll find nameservers here:
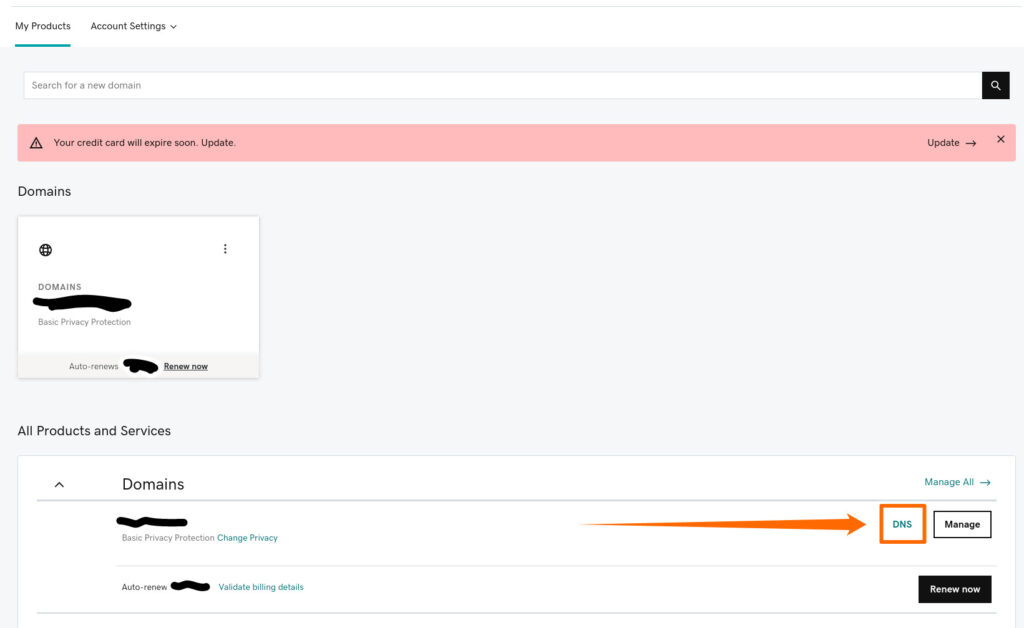
Finally set these nameservers to your domain register. Here I’ll explain how to do it in Godaddy. Login into Godaddy and click to “Go to my products“. Then you’ll find “DNS” subject to the right of your domain:
click to it and set nameservers:
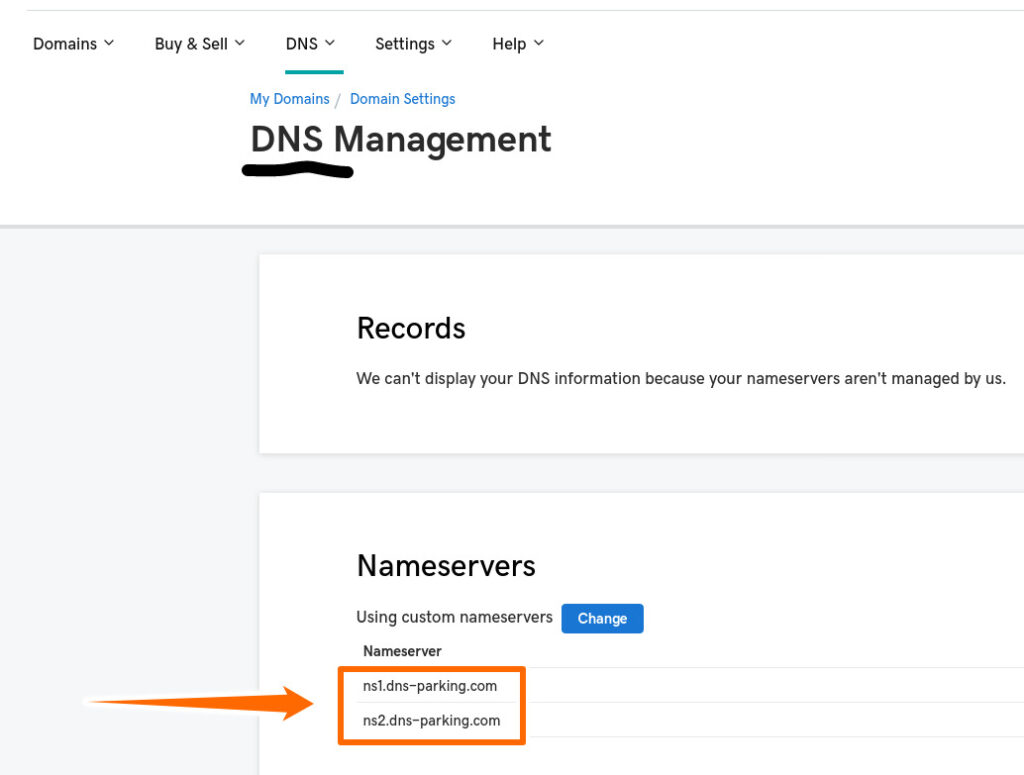
After a few hours your domain is online.
SSL
Using an SSL (Secure Sockets Layer) certificate is very important for security because it encrypts traffic between server and client. To do this it uses public-private key method.
Another very important advantage to use SSL is that through it the client can verify the server authenticity.
If a server uses SSL the web address will start with HTTPS (and not HTTP): “S” stands for “Secure”.
In Hostinger setting SSL certificate is very easy. In the main menu (the one on the top) there is “SSL” section:

Click on it and activate SSL (if the plan you paid for allows it).
Basic WordPress guide
Now to access your wordpress (installed before) and configure your site, just access your domain by adding “/wp-admin” at the end of the link. For example if your site is “site.com” just open the browser and type “site.com/wp-admin”. Now you have to login with credentials created first in the wordpress installation phase.
When you access you’ll see WordPress dashboard:
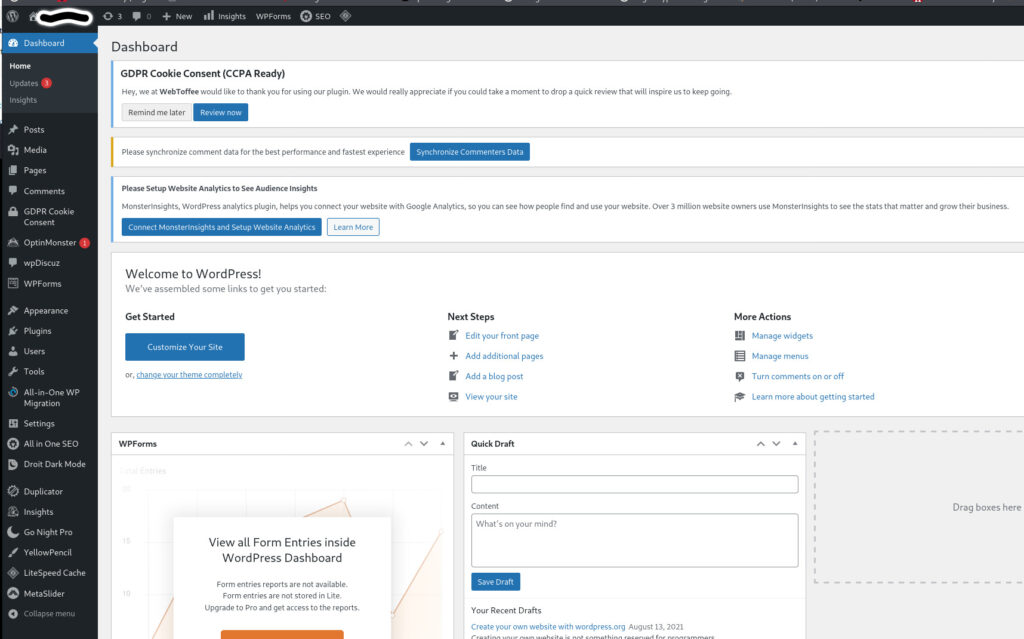
To the left there is the main menu where you can choose the various things to do:

For example, to mention the most important points:
- In “Posts” menu you can add a new post or modify or delete an old post.
- In “Pages” menu you can create or delete or modify a web page.
- In “Appearance” you can choose a standard WordPress Theme or you can customize your site or you can create or modify a site menu.
- In “Plugins” menu there are installed basic plugins to build or to improve the functionalities of your site but from here you can also install other new plugins.
- “Settings” menu is also very important because here you must set the “Site title”, the site URL, the site language, the admin e-mail, the permalinks, the settings of blog’s discussions and so on.
For IT security purposes, it is very important to perform wordpress version updates, plugins updates and all updates that are reported on the dashboard. This is to avoid cyber attacks that exploit known vulnerabilities on older software versions.
When you create a new Post or a new Page at the end you have to compile the “SEO Settings”. SEO (Search Engine Optimization) is very important for the visibility of your site. It is thanks to it that search engine finds your page.
Compiling SEO Settings is not difficult. It asks to set “Snippet Preview”, “Post Title” (or “Page Title”), “Meta Description” (it gives to provides readers a preview of the contents of the web page), “Focus Keyphrase”. When everything is set you can check the “Page Analysis” section which is located below “Focus Keyphrase” to see further critical issues useful for improving the Search Engine Optimization.
At the end, when your post (or page) is ready just click on “Publish” button to publish it. Instead, if you want to save but not publish nothing just click on “Save draft” button.
Indexing your site
To be found by visitors as soon as possible your site must be indexed on web search sites. To do this in “google” (the most used research site in the world) is useful create an account in “Google Search Console”, match your site in it (following the google instructions) and thus index your site.
Conclusions
In conclusion you don’t need an excellent knowledge of computers, html, php or java language to create your own blog. Indeed, I think anyone with a bit of passion can do it, certainly receiving a lot of satisfaction in the end.
And you never know that maybe your site can have a profitable future too :-)))